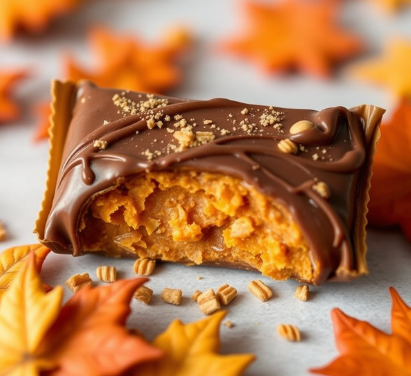
If you love Butterfinger candy bars, you’ll be obsessed with these homemade Butterfinger Treats! They’re crunchy, chewy, peanut buttery, and covered in a smooth layer of chocolate—basically, everything you want in a dessert!
Best of all? No baking required! These are super easy to make and perfect for parties, holidays, or just an indulgent snack.
Why You’ll Love This Recipe
✔ No-Bake & Super Easy: No oven needed—just mix, melt, and chill!
✔ Only a Few Ingredients: Simple pantry staples.
✔ Perfectly Sweet & Crunchy: A mix of chewy peanut butter and crispy Butterfinger bits.
✔ Great for Sharing: Make a batch for parties, gifts, or family treats.
Ingredients Needed
For the Base Layer:
- 10 mini Butterfinger bars, crushed
- 1½ cups graham cracker crumbs
- ½ cup peanut butter (creamy or crunchy)
- ½ cup unsalted butter, melted
- ½ cup powdered sugar
For the Chocolate Topping:
- 1½ cups semi-sweet chocolate chips
- 1 tbsp butter or coconut oil (for a smooth texture)
Optional Add-ins:
- ½ cup chopped peanuts or pecans
- ½ cup mini marshmallows
- Caramel drizzle for extra sweetness
Step-by-Step Guide to Making Butterfinger Treats
1. Crush the Butterfingers & Graham Crackers
- Place Butterfinger bars and graham crackers in a ziplock bag and crush them with a rolling pin.
- Alternatively, pulse them in a food processor until crumbly.
2. Mix with Peanut Butter & Butter
- In a large bowl, mix crushed Butterfingers, graham cracker crumbs, peanut butter, melted butter, and powdered sugar.
- Stir until everything is well combined and forms a sticky dough.
3. Press into a Pan
- Line an 8×8-inch baking pan with parchment paper.
- Press the mixture evenly into the pan to create a solid base.
4. Melt & Spread Chocolate
- Melt chocolate chips and butter in the microwave in 30-second intervals, stirring between each interval.
- Spread melted chocolate evenly over the peanut butter layer.
5. Chill & Cut into Bars
- Refrigerate for at least 1 hour until firm.
- Once set, remove from the pan and cut into small squares or bars.
Tips for the Best Butterfinger Treats
✔ Use Fresh Butterfingers: They should be crunchy, not stale.
✔ Don’t Overheat the Chocolate: Melt in short bursts to avoid burning.
✔ Chill Before Cutting: This prevents crumbling and keeps the bars neat.
✔ Line the Pan with Parchment Paper: Makes lifting the bars out much easier!
Variations and Substitutions
🌾 Gluten-Free Option: Use gluten-free graham crackers.
🥨 Extra Crunch: Add crushed pretzels for a salty-sweet twist.
🍫 Chocolate Lovers’ Version: Use a mix of milk chocolate and dark chocolate chips.
🔥 Spicy Kick: Add a pinch of cayenne pepper for a surprising heat!
How to Store & Keep Fresh
❄ Refrigerate: Store in an airtight container for up to 1 week.
🧊 Freeze: Freeze for up to 3 months—just thaw for 10 minutes before eating.
🔥 Room Temperature: Okay for 1-2 days, but best when chilled.
Common Mistakes to Avoid
❌ Using Too Much Butter: Can make the bars greasy. Stick to the recipe!
❌ Overheating the Chocolate: Stir frequently to avoid burning.
❌ Skipping the Chill Time: The bars need to set properly for the best texture.
Conclusion
These Butterfinger Treats are quick, delicious, and totally irresistible! Whether you’re making them for a party, a holiday dessert table, or just for yourself, they’re sure to be a hit.
Try them today and get ready for a sweet, crunchy, peanut buttery delight! 🍫🥜✨
Frequently Asked Questions (FAQs)
1. Can I make these treats without peanut butter?
✅ Yes! You can use almond butter or sunflower seed butter instead.
2. What’s the best chocolate for the topping?
✅ Semi-sweet or milk chocolate chips work best, but you can also use dark chocolate for a richer taste.
3. How do I make these bars extra chewy?
✅ Add a little honey or corn syrup to the peanut butter mixture for a softer texture.
4. Can I double the recipe for a larger batch?
✅ Absolutely! Use a 9×13-inch pan for a bigger batch.
5. How do I cut the bars cleanly without breaking them?
✅ Use a sharp knife dipped in warm water for clean slices.